Scaling Up: Building and Managing Multi-Team Next.js Projects with Turbo Repo and SST Ion
Discover how to deploy and manage large-scale Next.js projects across multiple teams using Turbo Repo, SST Ion, AWS, Lucia Auth, and Drizzle. This guide provides insights into configuring CloudFront for efficient routing and explores future caching strategies.

Scaling Up: Building and Managing Multi-Team Next.js Projects with Turbo Repo and SST Ion
In today's fast-paced digital world, the ability to scale and manage web development projects efficiently across multiple teams is crucial for large-scale applications. This blog post explores the use of cutting-edge technologies such as Next.js, Turbo Repo, SST Ion, AWS, Lucia Auth, and Drizzle in creating a robust framework for such deployments. By integrating these tools, we aim to enhance the collaboration and productivity of development teams, while also simplifying the deployment and management of complex applications.
We begin with setting up an Aurora Serverless v2 database using SST Ion, followed by the deployment of two distinct applications. This strategic setup not only facilitates seamless collaboration among different teams but also ensures that resources such as authentication tokens and data queries can be shared easily across applications, thanks to the clever configuration of CloudFront and domain-wide cookies. As we dive into the intricacies of this deployment, we will also preview upcoming experiments aimed at optimizing caching mechanisms, which promise to further streamline the development process and enhance the user experience across multiple applications.
Walkthrough
General Guidance Note: These steps are designed to help you navigate through the monorepo setup. This guide is not intended as a detailed tutorial or comprehensive course. Example Repo
Step 1: Configuring and Deploying the Database
The initial step involves setting up your database. Below, you'll find basic configuration details to get started. Please be aware that maintaining the database with the minimum Allocated Compute Units (ACU) will cost approximately $50 per month, as Aurora Serverless does not scale down to zero.
Configuration and management files for the database are located under packages/database in the repository. This directory includes schema management and table configurations. You'll also find scripts here for running migrations, which can be executed as part of the deployment process or performed locally using the sst shell.
/// <reference path="./.sst/platform/config.d.ts" />

export default $config({
  app(input) {
    return {
      name: "db",
      removal: input?.stage === "production" ? "retain" : "remove",
      home: "aws",
    };
  },
  async run() {
    new sst.aws.Postgres("MyDatabase", {
      version: "16.1",
      databaseName: "my_database",
      scaling: {
        min: "0.5 ACU",
        max: "1 ACU",
      },
    });
  },
});
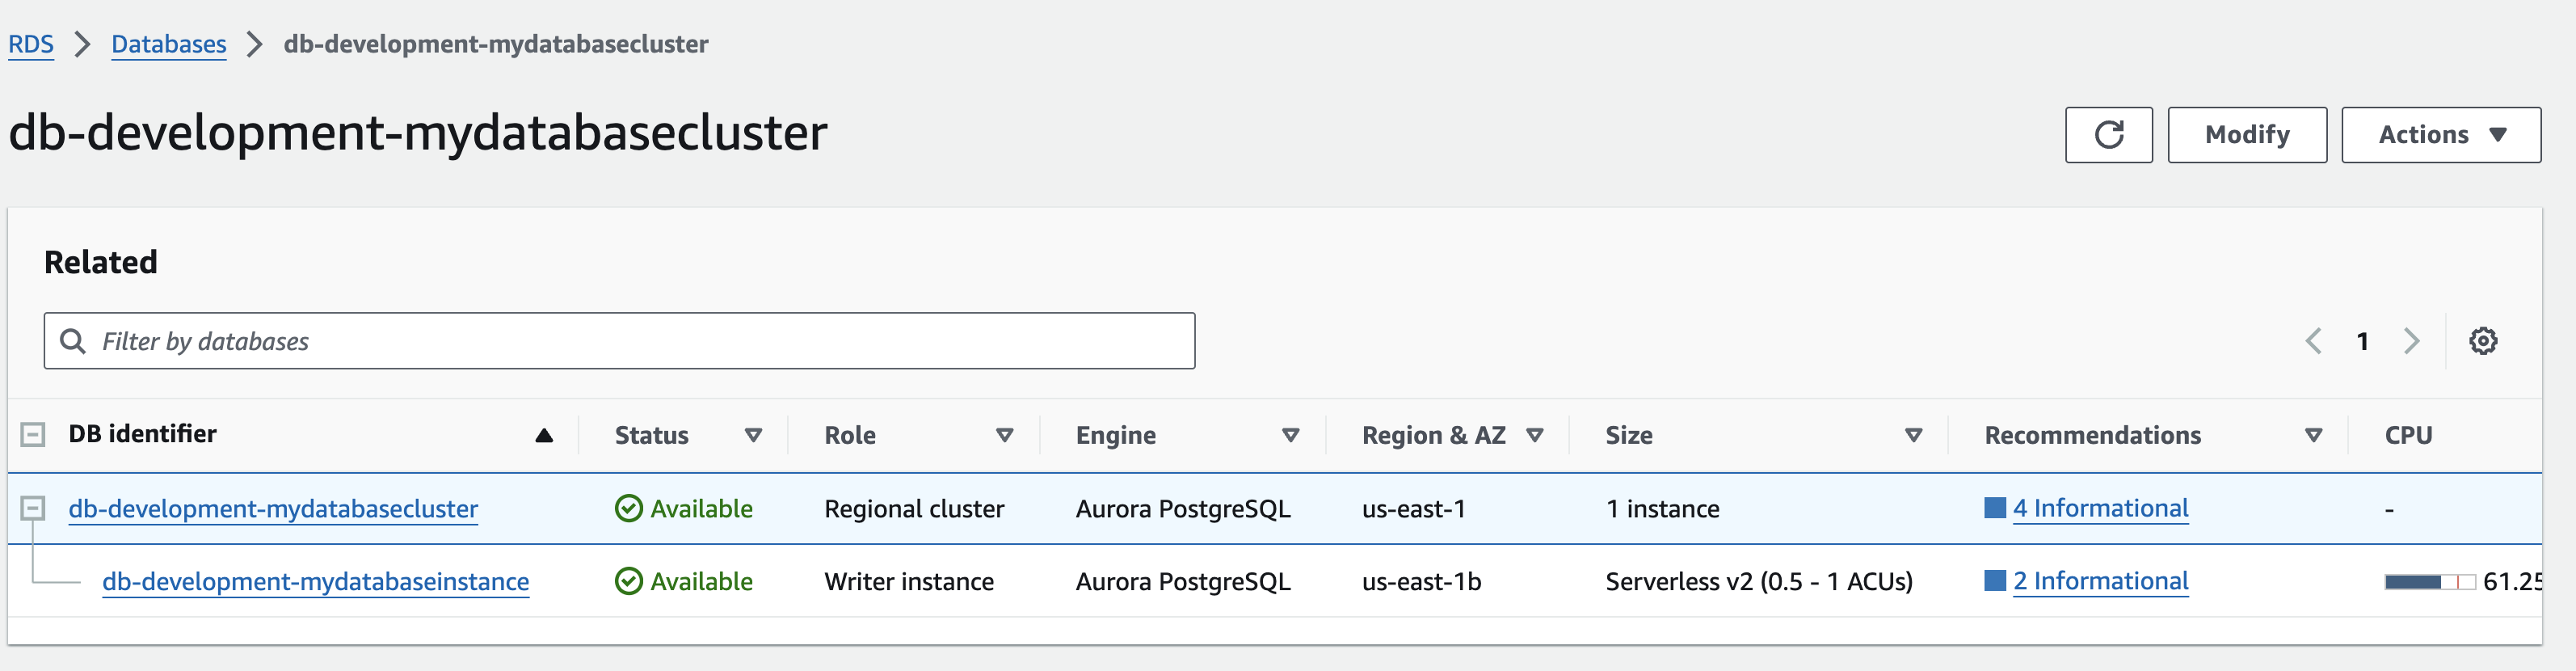
Once deployed you will see the table in AWS.
Step 2: Deploying Application A
Next, you will deploy Application A located in apps/app-a. You will need to gather the DATABASE_NAME, DATABASE_SECRET_ARN, and DATABASE_RESOURCE_ARN from the AWS console or CLI for the table you deployed earlier. These environment variables are used in packages/database/src/database.ts to configure Drizzle for the AWS Data API.
Currently, there is a .env file at the root and another at the app level, as deployments are being run in each app directory. In the future, I plan to consolidate these into a single .env file. Typically, deployments would be handled through a pipeline where environment variables are stored as secrets, making .env files unnecessary. Once deployed, you should see a new distribution set up in CloudFront.
Below is a snippet showing how Drizzle is configured with AWS RDS Data API in the database.ts file:
import { RDSDataClient } from "@aws-sdk/client-rds-data";
import { drizzle } from "drizzle-orm/aws-data-api/pg";

export const db = drizzle(new RDSDataClient({}), {
  database: process.env.DATABASE_NAME as string,
  secretArn: process.env.DATABASE_SECRET_ARN as string,
  resourceArn: process.env.DATABASE_RESOURCE_ARN as string,
});
/* eslint-disable no-undef */
/// <reference path="./.sst/platform/config.d.ts" />

export default $config({
  app(input) {
    return {
      name: "app-a",
      removal: input?.stage === "production" ? "retain" : "remove",
      home: "aws",
    };
  },
  async run() {
    new sst.aws.Nextjs("AppA", {
      openNextVersion: "3.0.0-rc.15",
      environment: {
        NEXTAUTH_JWT_SECRET: process.env.NEXTAUTH_JWT_SECRET as string,
        DATABASE_NAME: process.env.DATABASE_NAME as string,
        DATABASE_SECRET_ARN: process.env.DATABASE_SECRET_ARN as string,
        DATABASE_RESOURCE_ARN: process.env.DATABASE_RESOURCE_ARN as string,
      },
    });
  },
});
Step 3: Deploying Application B
The deployment process for Application B is similar to Application A, but it includes additional configurations to cater to its specific needs as it's not the base application.
Firstly, to enable server functions to execute correctly, you must update the Next.js configuration to allow requests from specific origins. This is crucial for maintaining the security and functionality of your server-side operations. Add the following configuration under the experimental key in your Next.js config:
  experimental: {
    serverActions: {
      allowedOrigins: ["*.your-subdomain.com"],
    },
  },
Additionally, since Application B handles all routes starting with /b, you need to set a base path in the Next.js configuration to ensure that the routing behaves as expected. This is done by adding the basePath property:
basePath: "/b",
After updating the configurations, proceed to deploy Application B. Similar to Application A, you should observe a new distribution set up in AWS for this application.
Step 4: Configuring CloudFront
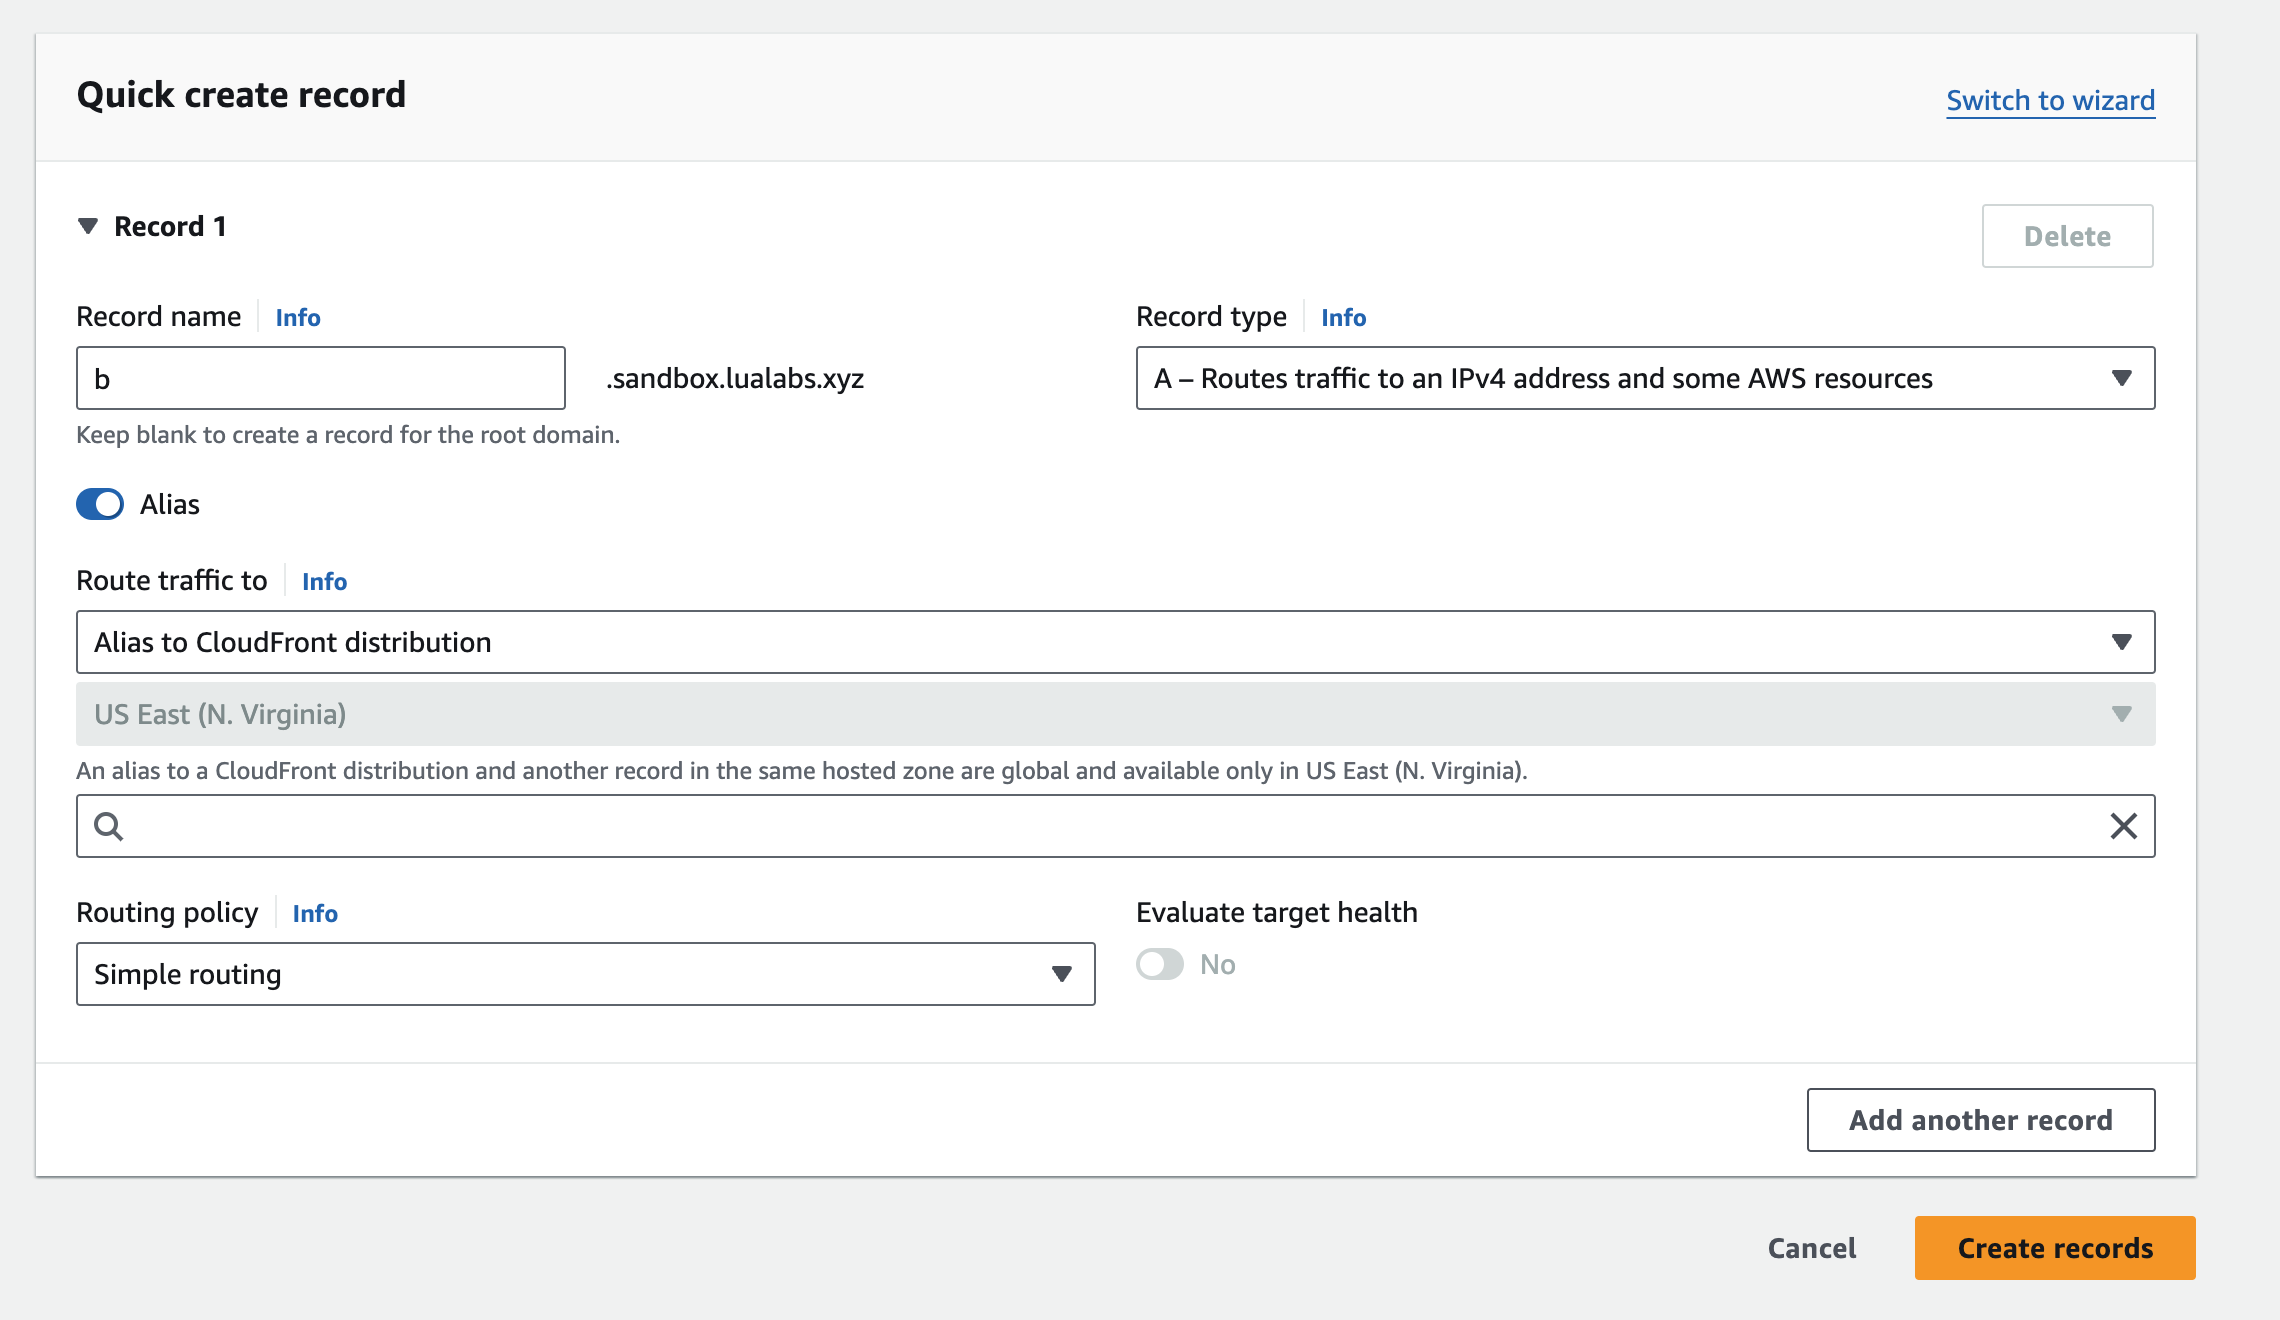
Configuring CloudFront correctly is essential for managing traffic to your subdomains. Begin by setting up both subdomains in Route 53.
First, create an A record with an Alias that points to the CloudFront distribution. Start by adding the subdomain in CloudFront, then follow with the Route 53 configuration. Below is an example of how to configure the A record in Route 53:
Once your DNS settings are in place, the next step is to configure the routing rules in CloudFront. In this setup, Application A serves as the parent route. All paths prefixed with /* will route to Application A, except those starting with /b, which will route to Application B. Below is an example of how to configure these routing rules in CloudFront:
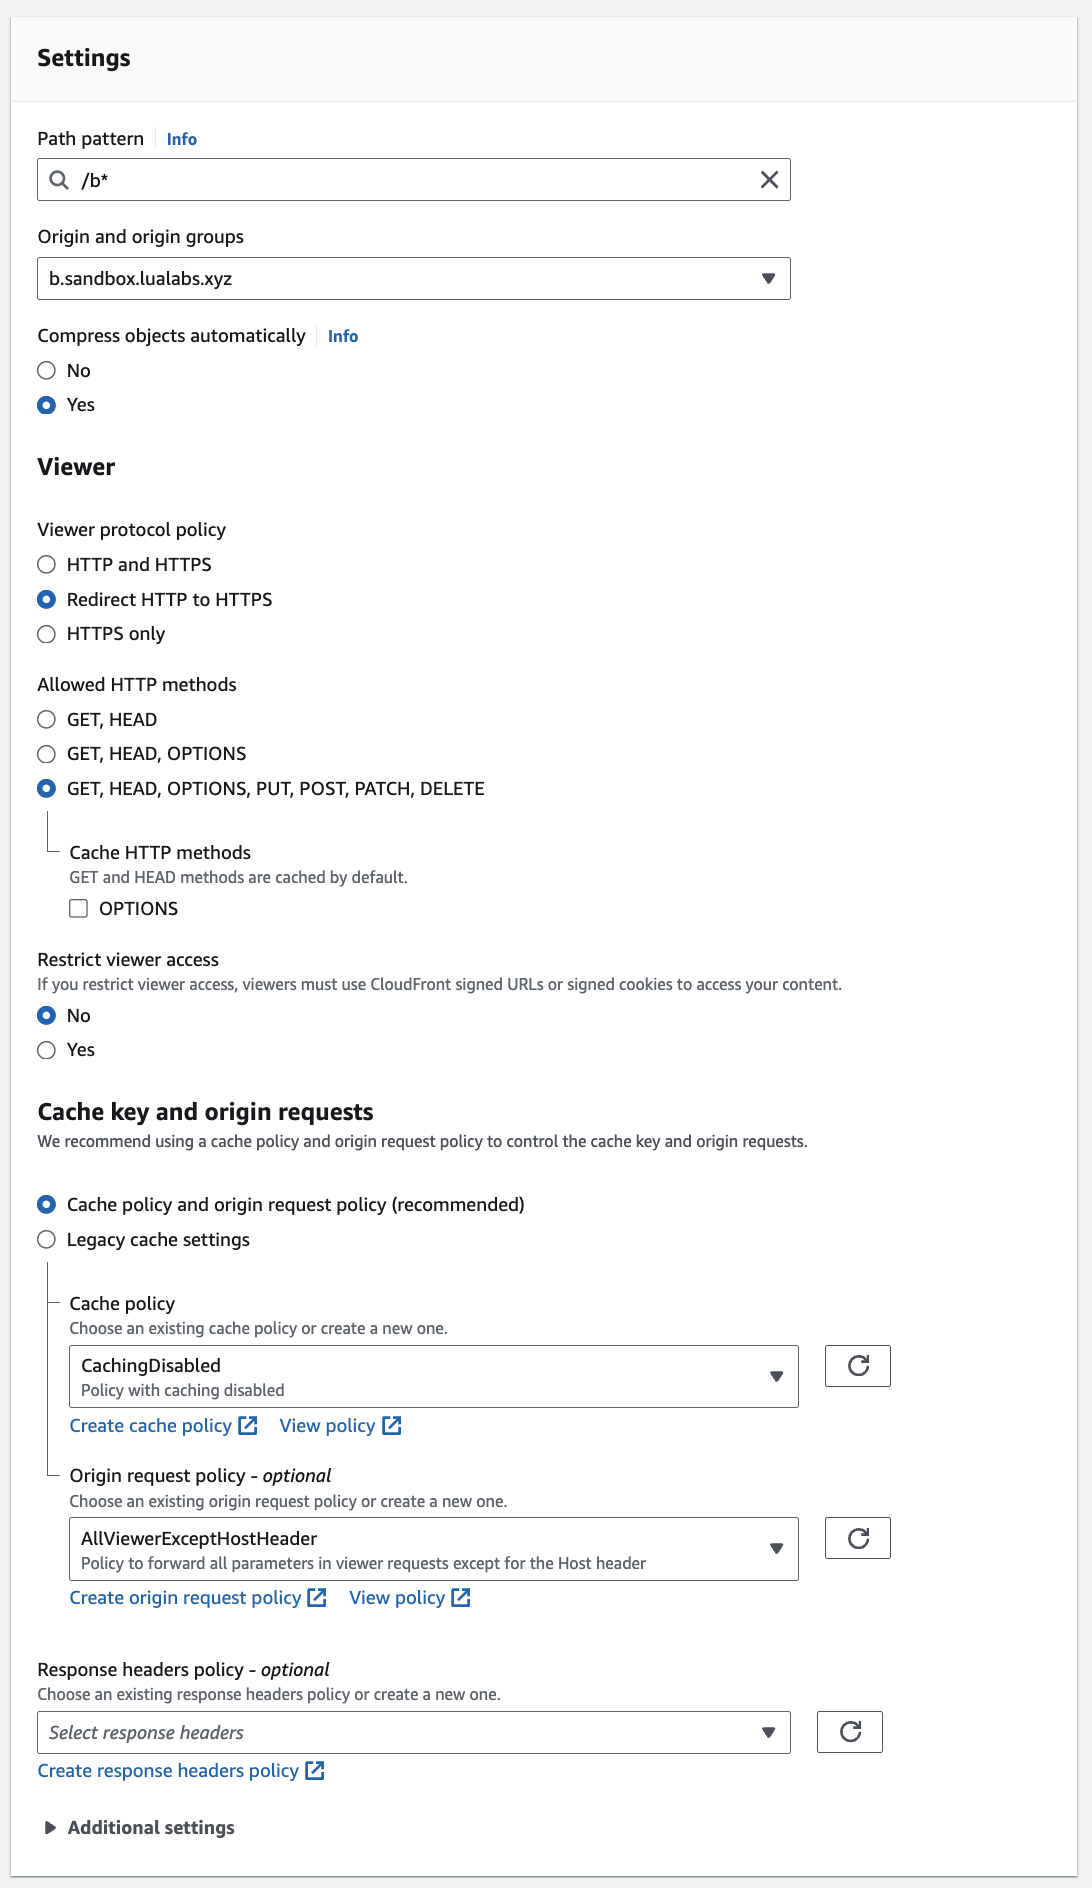
By carefully setting up these configurations, you ensure that traffic is efficiently managed between the two applications, optimizing performance and user experience.
Conclusion
With the configuration steps completed, you can now see how seamless it is to share queries and authentication across applications within the repository. While the current solution does not optimize caching across different apps, I am in the process of developing a custom SST construct that will enhance this capability. This improvement will ensure that any shared query will only be invalidated if one of the applications modifies the caching tag.
If you have any questions or need further assistance, feel free to reach out. For additional information or to explore these tools further, here are some useful resources:
Get in touch with us
This is the best way to get in contact with us, to send any inquiries, set up a call or to ask any questions. Feel free to reach out directly at contact@lualabs.xyz